When The Vehicle Is Parked For A Long Time, Should The Oil Be Changed?

When The Vehicle Is Parked For A Long Time, Should The Oil Be Changed?

Consider a case where a car has been left idle at home for nearly a year since the last maintenance. During the next school holidays, the owner wants to drive outstation but is worried that it will be unsafe if the car has been left idle for such a long time. Will his car pose a safety hazard? Will he need to change the engine oil?

Everyone knows that changing engine oil is based on mileage of the vehicle. However, if the car has not been running for a long time and the mileage does not meet the oil replacement standard, then is it still necessary to change the engine oil?.

Oil change cycle

The oil replacement cycle must be comprehensively evaluated from two dimensions:
The first dimension is the distance traveled by the vehicle (after the last maintenance). Each vehicle is accompanied by a “Maintenance Manual” when sold. The maintenance specifications for this vehicle are described in detail in this maintenance manual. Due to the difference in brand and engine characteristics, the maintenance specifications for each vehicle are not the same. For example, some suggest replacing engine oil every 5000 kilometers, and some are replaced every 7,500 kilometers. Whether it is the owner’s desire or the after-sales staff’s suggestion, everybody basically has a certain concept of changing their vehicle engine oil based on the mileage of their own vehicles.

The second dimension is replaced by time. If you look up the vehicle maintenance manual, you will find that the contents of the regular maintenance items (such as oil change) in the manufacturer’s vehicle maintenance manual will be marked by a suggested time interval (or other form of remarks) in addition to the mileage.

Why do you need to change engine oil by time?

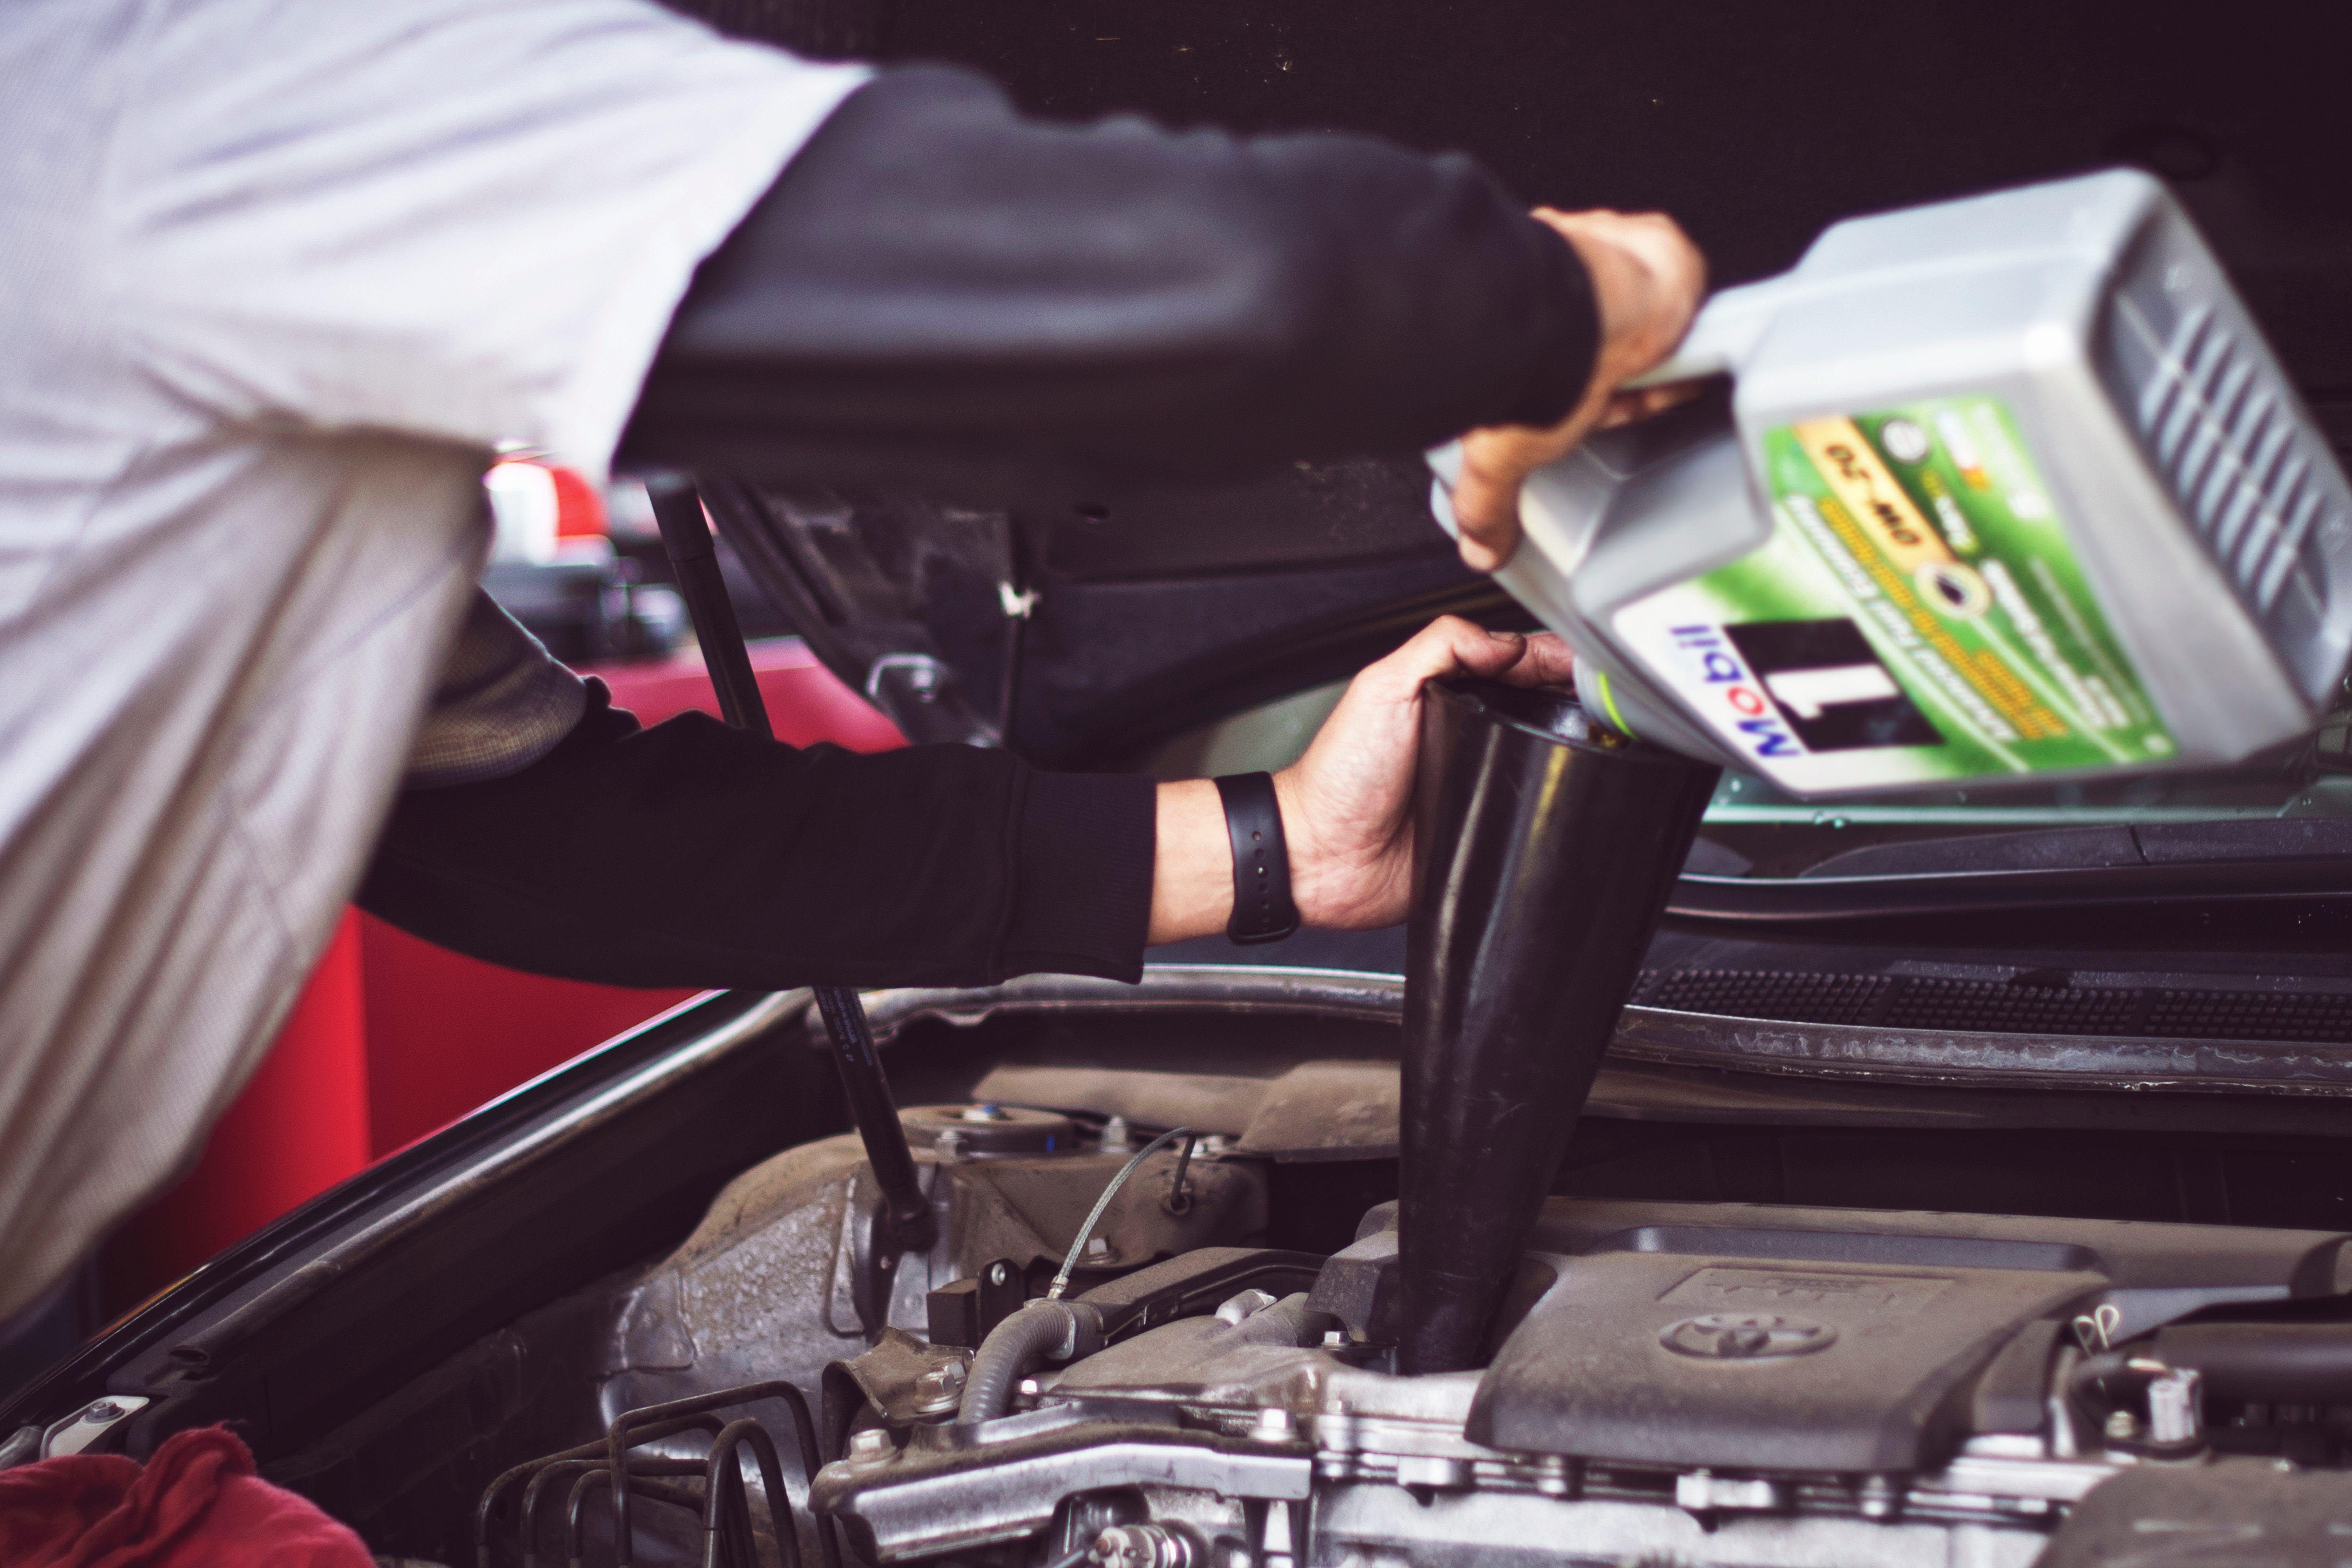
Under the condition of normal use of the vehicle, the engine oil can achieve important functions such as lubrication, cleaning, cooling, sealing, rust prevention, buffering, etc. through the non-stop circulation during engine operation. The environment in which the engine is operating is “very tough” (high temperature, high pressure, high-speed circulation, etc.), which accelerates engine oil deterioration/decay. If the engine is like the heart of the vehicle, the engine oil is equivalent to the engine’s blood. However, unlike blood in the human body, engine oil is not able to replace itself. Therefore, regular oil change is necessary. But is it still necessary to change the oil for long-term parked cars?

In short, necessary!

First of all, the oil itself is a chemical reagent, so its function and efficacy are of a certain duration. Oil does not appear to be highly alcoholic. The more you place it, the more it becomes “aged,” and the oil added to the engine absorbs moisture from the air, causing the oil to degenerate and emulsify (a white foamy liquid is formed). A deteriorated or emulsified engine oil will lose the oil’s properties, and it will not have the functions described above. If you use engine oil that has deteriorated and fail to run the engine, it has a certain negative impact. In addition to deterioration and emulsification, when the vehicle is idle for a long time after the first cold start, the oil has basically returned to the sump, and there is no oil film protection inside the engine. At this time, the first cold start of the vehicle will cause relative damage to the engine causing excessive wear.

In addition, limited by the current technical conditions, in fact, each time the oil is replaced, the previous old oil cannot be completely discharged completely. In particular, when the vehicle has high mileage, the oil that is deteriorated into a gum will stick to the inner wall of the engine. Therefore, they themselves become “secondary sources of pollution,” and they also aid in accelerating the deterioration of new oil.

How to judge engine oil deterioration?

It may be a bit difficult for non-professional car owners to determine if engine oil is deteriorated. The level of deterioration depends on the type of engine oil used (mineral oil, semi-synthetic oil, synthetic oil), the environment where the vehicle is parked, and the tightness of the oil pan, etc. Generally, if the car owners really care about their cars, and for the sake of proper vehicle maintenance and safety, it is necessary to change the oil according to the time specified in the vehicle maintenance manual.

Other suggestions for not using the car for a long time

If you do not use the vehicle for a long period of time, there will be some depletion of the car’s battery, rusting of brake pads, and added deterioration of rubber components such as hoses, belts and tyres. As such, it is always adviseable to let the car ‘run’ or start up occasionally to allow all the engine parts to be well lubricated. If a car has to be left idle, it is best to start up the car every two to three weeks, if possible. This will not only charge the battery, but also prevent the tyres from losing strength and being deformed; and doing so will help lubricate the engine and protect engine components. If you are on a business trip or travelling, it may be adviseable to ask a friend or family member to help start the vehicle once a week to check if there is any abnormality in the operation of the engine. In this way, you can guarantee that there will be no problems when you use the car again.

DIY Car Cleaning Tips – Interior

DIY Car Cleaning Tips – Interior

Vacuuming Car Interior

Although most of us wind up our car windows and switch on the air-conditioner when we travel in our cars, unknown to us, we can be breathing in foul or dirty air if our car interiors are not well maintained. Dust, dirt and pollen can enter our cars when we open and close our car doors. Having inefficient or expired cabin air filters in our cars can also let these pollutants in. The clothes that we wear, the fabric on our car seats and the fibres in our car floor mats also shed lint which can accumulate inside our cars. A person with a sensitive nose or suffering from allergy will be the first to detect air that is dirty in our cars. For those of us who are unaware of this, we could be breathing in dirty air day in and day out and in the long run, this could bring about health problems. That is why, regular vacuuming of our car interior is a good practice as much as cleaning our car’s exterior.

If we maintain our cars by ourselves, it would be good to invest in a good hand-held vacuum cleaner. This will ensure that every nook and cranny of our car can be reached when we vacuum our car interior. We start with the relatively cleaner areas such as our car dashboard, console, door panels, glove compartments and door pockets. We use the brush attachment that comes with our vacuum cleaner or a paint brush with the tapered attachment to wipe off dust especially in the louvres of our air vents and catch the dust with our vacuum. After vacuuming, we can lightly wipe them and our glass windows with a moist microfibre cloth to pick up any leftover dust. For clean, healthy air to pass through our air vents, we can sometimes spray them with an all-purpose cleaner or use a mild disinfectant and wipe off with a cloth.

Next, we vacuum the car seats and upholstery especially the crevices of any dirt, debris or fallen hair. Lastly, we remove all floor mats and dust them outside the car and vacuum the underlying carpet. To reach deep in between the fibres of the carpet, we run the vacuum cleaner along the line of the fibres to kick up all dirt that may be stuck there. Regular vacuuming of our car interior will keep us and our passengers fresh and healthy when travelling in our car.

Cleaning Car Seat / Leather

To clean car seat upholstery made of woven cloth or fabric that is badly soiled or dirty, we will need first to vacuum it and remove all dirt and debris before wetting and cleaning it. We spray the pre-vacuumed seats with a fabric cleaner or shampoo and scrub gently with a soft brush to remove all dirt and stains, mopping up by hand using a microfibre cloth. For parts that are heavily soiled, it is good to repeat this action a few times, scrubbing the linen gently to avoid patches on the car seat.

For car leather seats, we spray a generous amount of leather cleaner directly onto the surface. We can use a clean microfibre cloth to rub the cleaner into the seat in tiny circular motions, gently removing dirt and stains on the leather. We let it remain for about 30 seconds and then wipe clean with a clean cloth. If stains or dirt still persist, we repeat this action by applying the cleaner directly onto the seat and gently scrubbing and then cleaning the seat. We air the car to remove the smell from the leather cleaner and our car seats can be as good as new.

For more DIY Car Care tips, read from posts on DIY Car Cleaning Tips for Exterior and DIY Car Care Tips for Body Paintwork.

DIY Car Care Tips – Body Paintwork

DIY Car Care Tips – Body Paintwork

Car polishing

There is often confusion between car polishing and car waxing. Polishing should always come first. True car polishing is a form of paint correction whereby our body paintwork is restored in a permanent way in its depth, shine and gloss through the removal of scratches, blemishes and other paint imperfections. It is done by removing thin layers of paint coat (paint correction) by applying an abrasive compound in the car polish or wax onto our car body paint. It makes small scratches and swirls on our car body disappear, leaving an even, like-new surface behind. After this is done, we can then carry out car waxing to add shine and gloss to our car. Car waxing adds a protective layer that prevents contaminants from adhering to our car body and resists new imperfections. In addition, it is what gives our car paint a deep shine and glossy as-good-as-new look.

However, many products that are sold as car polish do not usually have abrasives in them. They may have chemical cleaners that have ingredients that use solvents and chemicals to dissolve and remove oxidised material or dirt on car surfaces but do not contain any form of true polish or abrasive material.
Cleaner car waxes, ie. polishes that do not contain abrasives are good for beginners to start polishing our cars with as we can use it as often we like without making any paint correction. These products actually perform the ‘polishing’ or ‘cleaning’ using chemicals and not abrasives thus restoring and enhancing the car body gloss. If our car paint is still in relatively good condition, we can use these cleaner car waxes or milder polish without abrasives. They should be sufficient to remove light swirls and scratches on our car body. Where car paintwork is old or heavily damaged, or where more serious body paintwork restoration is required, the services of a professional detailer or car care expert will probably be needed.

Car polishing done by ourselves can be easily carried out by hand or by a machine polisher, if we can get hold of the equipment. If done by hand, we use a clean microfibre cloth and apply a drop of polish to the cloth. It is good practice to test out on a small discreet area first to check for discolouration, damage, texture, and any other changes that might happen on our car with a product never used before. We wipe the cloth with the polish across a 2-ft by 2-ft section at a time. We rub in an even circular motion, adding polish to the cloth as we go and using a new section of the cloth for new areas. We apply sufficient pressure only to clean the top layers of our car bodywork and are careful not to wear away the car’s paint and coating over time. To protect delicate areas like rubber moulding and plastics on our car body from being affected by the chemicals in the car polish, we can cover these parts with masking tape.

If we use a machine polisher, it may take up lesser energy on our part but care must also be given on the amount of pressure to apply on the polisher so as not to over polish our car paintwork. When using a machine polisher, we put on the applicator pad on the polisher and then add a small amount of polish to the pad. We begin with a low speed, lightly spreading the polish around the working section and then adjusting to a higher speed on the area being polished. We work in the polish using back-and-forth strokes creating a crosshatch pattern. We continue until the polish thins and is evenly applied, and then wipe clean with a microfibre cloth. This process is repeated for each section until the whole car is complete.

Car waxing

Car waxing helps provide protection and visual enhancement to our cars. It can help nourish and enhance the appearance of the outermost layer of our car body. Restoring paintwork, removing defects, scratches, and loss of shine will require the use of abrasives or cleaners in polishes.

Our cars would have had a new clear coat of paint when it was first manufactured, but this coat wears off over time and the paint is left to fend for itself against the elements. To protect the paintwork, we use car wax. Wax is sacrificial in that it will wear off over the course of a few months and will need to be re-applied if we want to maintain protection on our car body paintwork. The wax applied on our cars absorb stains and small scratches before those hazards make it to the paintwork.

Car wax can come as a paste, liquid or cream. A popular type of car wax used is the carnauba-based (natural) wax which can come in various forms. Others prefer synthetic polymer waxes, also known as paint sealant. One application of any of this wax can usually last about one and a half to two months.

Like our car polish, we can either apply wax manually by hand or by using a machine polisher. If using liquid wax, we remember to shake the containers before use and from time to time during application so as to get an even mix of the wax. If applying manually, we put a few drops of the wax on a clean mircrofibre cloth and rub evenly on small sections at a time in circular motion. Using a machine polisher, we apply the wax to the foam applicator and rub it into the finish with a swirling motion. As it dries, the wax will form a haze on the car surface. We wipe off the haze from the car surface with a clean microfibre towel. We repeat this process until the whole car is waxed. It is common to apply two coats of wax when waxing our cars, for the second coat to cover areas that the first might have missed. If our car is often kept outdoors, it would be good practice to wax our car once every few months to maintain the shine on the paintwork.

Read other posts on DIY Car Cleaning Tips for Exterior and DIY Car Care Tips for Interior.

DIY Car Cleaning Tips – Exterior II

DIY Car Cleaning Tips – Exterior II

Under the harsh weather conditions our cars are subject to, our car body paintwork needs the most care for us to maintain it as bright and shiny, and near to its original state. Strong UV light from the sun’s rays, acid rain, bird droppings, dust and dirt from the streets and the surroundings our cars travel in, all can contribute to the fading and contamination of our car’s original paintwork. Thankfully, most modern cars manufactured today are protected with clear coat over the paintwork to prevent rapid deterioration from long exposure to the elements. However, to maintain them at near original state, some maintenance on our part as car owners can be carried out without having to spend too much effort and money to restore them.

Decontaminating car paint

After a good car wash, there can be times when we feel some roughness due to stubborn contaminants still stuck on our car surface. These are contaminants picked up from exposure to the surroundings especially with our cars travelling at speed against dirt in the atmosphere which get embedded into the clear-coat of our car’s paint surface. Polishing and waxing may sometimes remove them but if not done effectively can cause scratches to our car body. The best way to remove them is by using a good clay bar kit which can be used to literally pluck out the contaminants from the car surface.

A good clay kit would include a lubricating spray and several pieces of synthetic clay. To begin decontaminating our car paintwork, we have to get our car washed off superficial dirt and wiped dry. We tear off a small chunk of clay and flatten it into a small pancake in the palm of our hand. We then squirt the lubricating liquid or spray wax on one section of our car body and on the paint clay. Using straight-line strokes, we move the clay with a back-and-forth motion over the car surface and continue until the surface feels smooth. We can fold the clay again, knead it and re-flatten to rub on the car surface until the clay turns gray. When that happens we use a fresh piece until the rough surfaces are removed and we get a glass-like finish.

Car glass cleaning

Acid rain mixed with dust and dirt in the atmosphere or when it acts on rubber and vinyl on our car windows can cause streaks of stain to remain on the glass windows of our cars. Washing with normal car washing liquids seldom remove these stains. This is where good glass cleaners come in. It is essential that we find specially formulated glass cleaners that do not have ammonia, which most household glass cleaners contain. Ammonia causes damage to vinyl upholstery and the instrument panel.

Using a clean microfibre cloth, we spray 2 or 3 squirts of glass cleaner and rub the insides of windshield and windows using straight-line strokes (not circular). This is very effective in removing dirt, grease and other residue on tinted windows and mirrors without damaging them. We then repeat the same for the glass windows and windshield on the exterior of our car and use a clean microfibre cloth to remove any remaining streaks.

For more DIY Car Care Tips, read our posts on DIY Car Cleaning Tips for the Interior, more DIY Car Cleaning Tips for the Exterior and DIY Car Care Tips for Body Paintwork.